Thanks to COVID-19, we’re all much more familiar with video conferencing. This is a note about the kit I’ve been using, and some suggestions on improvements.
This is my set-up:

Lighting
Lighting is the single most important thing to get right. There are many tutorials on YouTube. I like these videos from Epic Light Media.
For the main camera — on the left of the monitors in the picture above — I have three standard lights:
- The key light, which is the main one, placed at 45º to create flattering shadows;
- The fill light, on the other side, which allows you to control the depth of shadow;
- The hair light, from high up and behind, which lifts you off the background.
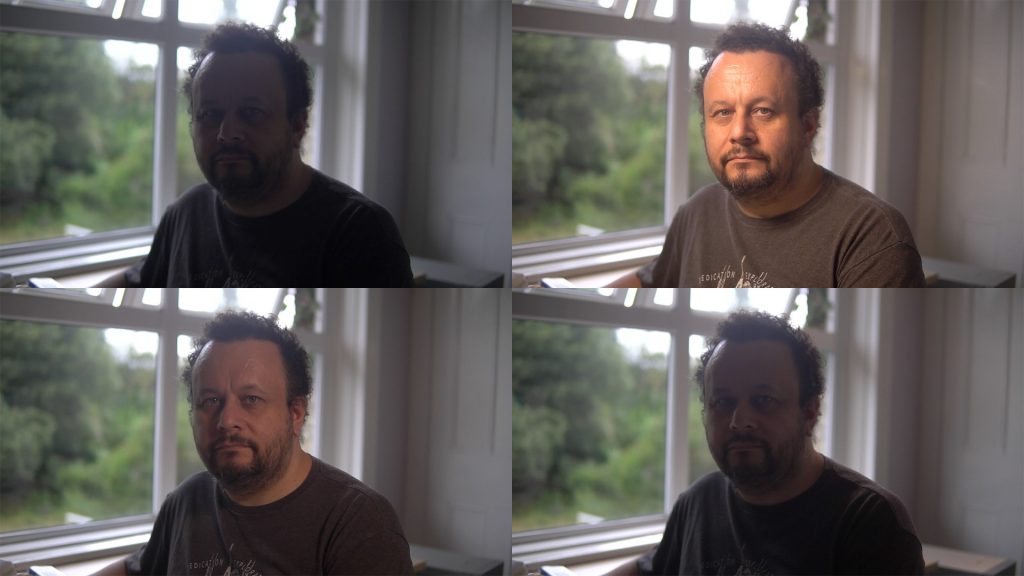

I have use 3× Viltrox VL-S192T for those lights. These are fairly cheap LED lights which have the advantage of an RF remote, which has been very convenient — you can make adjustments while sat in front of the camera, instead of having to get up, so you can see what you’re doing.
Initially went for even cheaper lights from Neweer before I learned about colour rendering index (CRI). Definitely use lights with 95+ CRI scores. The issue with LEDs is that their spectra can be peaky — you don’t see it, but your camera does and your skin ends up looking uncorrectably weird.
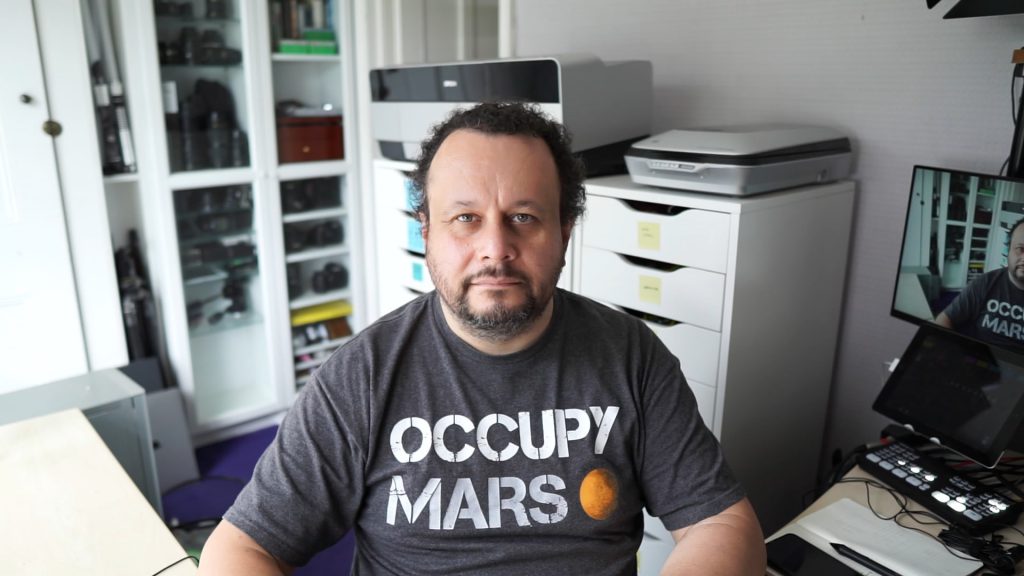
I also have a Viltrox VL-200T, which is smaller and uses the same RF remote. I have it set up on the other side so that at mimics the window in case I’m using the other camera:
HDMI (video input)
I wanted to use HDMI to connect a camera to my computer. This is more flexible than using USB, and generally allows high quality.
Things are a bit better now, but in peak lockdown the staple Elgato Camlink 4k could not be had for love nor money, and is still hard to find. I bought a Magewell card — available, I suspect, because it’s expensive. It worked, but I found I had problems with the audio so I ended up returning it. YMMV.

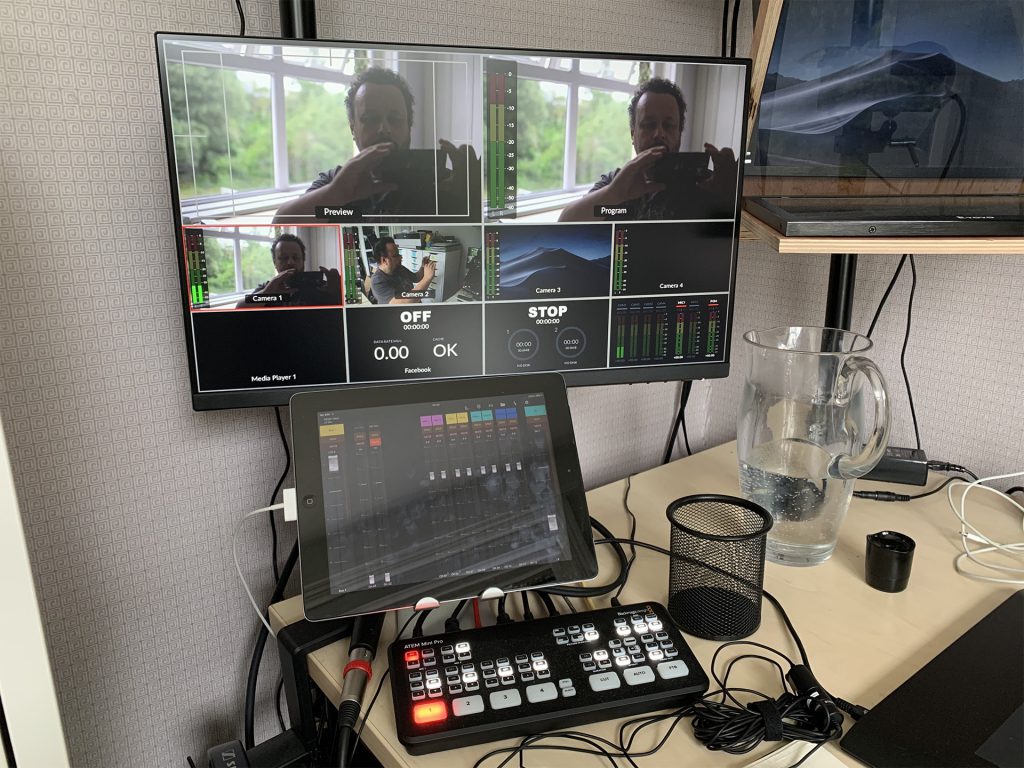
I ended up with a Blackmagic ATEM Mini Pro. This is a switcher with 4 HDMI inputs (1080p, not 4K), an HDMI output and a USB C output. It also has two audio inputs for microphones. This seems solid, and gives you nice multi-camera capability. I indulged in the Pro for its extra features: on-board recording; on-board streaming direct to (eg,) YouTube and Facebook; multi-view. The regular version is cheaper (as I write, it’s in stock at Thomann while the Pro is 2–3 weeks lead time) and would have been fine, really, since you can use OBS for all the streaming and recording. I do like the multiview, though, particularly as it gives you an audio level meter for your “program” output (ie, what you’re transmitting). Either version has picture-in-picture, chromakey and the ability to add graphics, such as a lower third.
If you’re going a bit higher end with your production, the ATEM Mini Pro also has camera control for Blackmagic’s own cameras (below).
Sound
The ATEM Mini has two 3.5mm jacks for audio input separate from your cameras, which is helpful. They’ve also recently updated the firmware so you can add up to 8 frames delay to those audio inputs in order to sync them up with video. The ATEM Mini has a moderately capable mixer inside it, too.
I’m using an Audio Technica ATR3350 lav mic. Perfectly good for the money.
If you prefer wireless, I have heard good things about the Rode Wireless GO (also in white).

I’m using a Behringer XR12 mixer. If you’re only doing video with a couple of microphones this is irrelevant. However, for my home office it’s a very neat setup. All my audio sources are live to the speakers at once; I can easily tweak the sound that goes into the ATEM Mini (before it could do delay I could do that externally); I can use an iPad on a stand to give me a customised set of direct controls using the app Mixing Station, which I can also run on my phone.
To avoid echo on video calls, I use the lavalier mic and a pair of earbuds, with the cables going behind my shoulders.
Cameras
Adding an HDMI adapter to an iPhone and it seems to work pretty well as a camera. The CameraVision app gives you a clean HDMI output. An alternative to HDMI is to use Camo on your iPhone, which lets your computer see it as a camer when plugged into USB.
I had never had a GoPro, but after watching this video I bought a £50 GoPro Hero 4 off eBay. Might be useful as a B camera/overview camera. Works; haven’t used it yet in anger.
I mostly use Sony APS-C cameras, particularly because the default face-detection autofocus is so good. I have an A5100 and an A6300, both second hand off eBay. If you don’t want 4K, the A5100 seems just fine — I initially went for the A6300 because it has a mic jack, although I don’t need that now. If you have a bit more to spend, the later ones like the A6400 are better still. The full-frame ones seem overkill, but A7RII seems popular, and obviously good in the field because of better low-light performance. I’ve got dummy batteries on both to reduce the risk of overheating. Also, turn on their airplane modes for the same reason.
I am using Sigma “Contemporary” f/1.4 lenses — 16mm and 30mm — for the shallow depth of field. They work very well with the Sony autofocus, and are much cheaper than Sigma’s “Art” lenses if you don’t need full frame.
If you’re really not too worried about budget, you might look at the Blackmagic Pocket Cinema 4K and Blackmagic Pocket Cinema 6K cameras. If you use these with the ATEM Mini Pro, you can control the cameras through the console, including colour settings so you can have properly graded streams and multi-camera recordings that you can use straight away. You also get tally lights, I believe.
Teleprompter
Although I had learned the discipline of looking at the camera on the occasional videoconference with a client, I found it quickly wearing when they became so much more frequent. Therefore, I decided to make my own teleprompter, so I could look straight into the camera while talking to someone. This comes across well on calls, and also allows you to have notes up (and take notes) without breaking gaze.
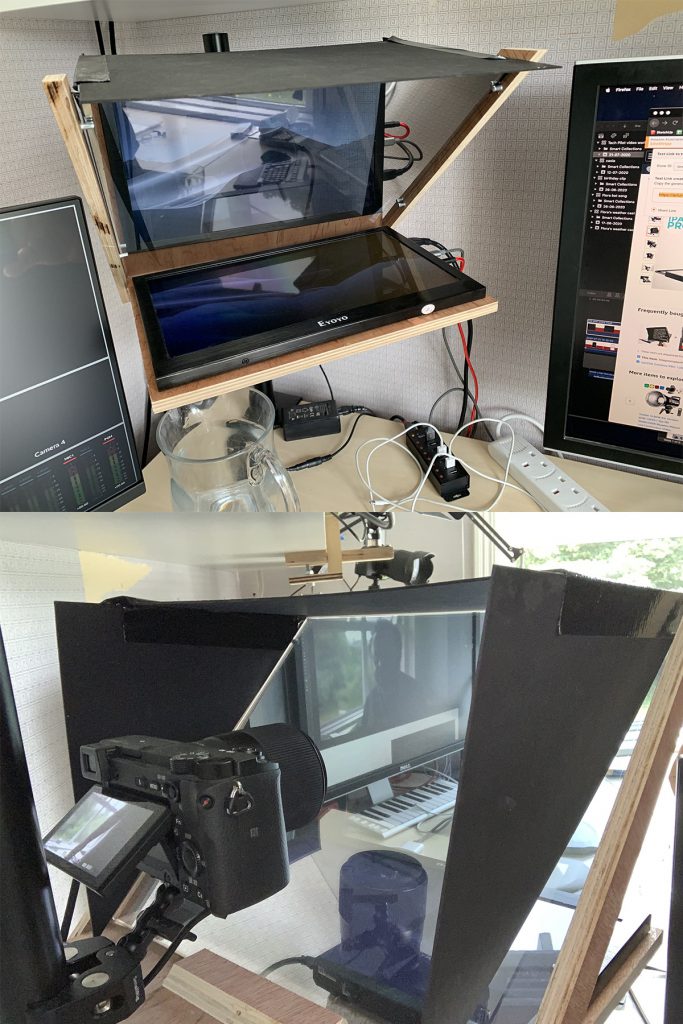
This isn’t hard to make, and there are many YouTube tutorials. My favourite is from the excellent Matthew Perks, who flips the standard arrangement by having you look through the glass at the screen and having the camera see you in the reflection.
If you don’t fancy making one you can just buy off the shelf. For example, this one:

You can see it’s designed to be used with a tablet. These are much cheaper, and fine for putting a script on. You can buy units that have monitors in this (like this) but they’re way dearer. You can just about get away with using an iPad as a monitor (I used Duet when I first did this), but it’s a bit flaky. In the photo you’ll see I have a 13.3-inch HDMI monitor from a random Chinese brand. This is the same sort of thing. This is similar size to a large iPad (there are 11.6-inch ones as well) so you can use them instead and plug them into your computer.
The image from your screen is backwards in the mirror. This doesn’t really matter for video calls. However, it’s more convenient if you can flip the image on the display so that it’s the right way around in the mirror. On a PC, you can usually do this in the monitor set-up. On a Mac, not so much, unfortunately. You can buy this gadget to do it in hardware. I have achieved the same with a Decimator MD-HX scaler off eBay.
Mounts
have found Duronic poles, clamps and monitor mounts (like this 60cm pole) very good for neatening up your desk. I have my teleprompter and its camera attached to one, and one of my lights and the monitor for the ATEM Mini Pro attached to the other.
Future improvements
This all works pretty well, but experience inevitably brings ideas for making it better.
The biggest improvement would be a much larger teleprompter. The current one works fine, but the size of it is limiting in two ways:
- I can’t use the wide angle 16mm f/1.4 lens because it sees the edges of the teleprompter’s frame;
- The 1080p image means that text and menus etc. are a bit small, so I find myself having to lean in sometimes to see them.
It would be cool to have a much larger teleprompter, perhaps based around a 65″ screen:
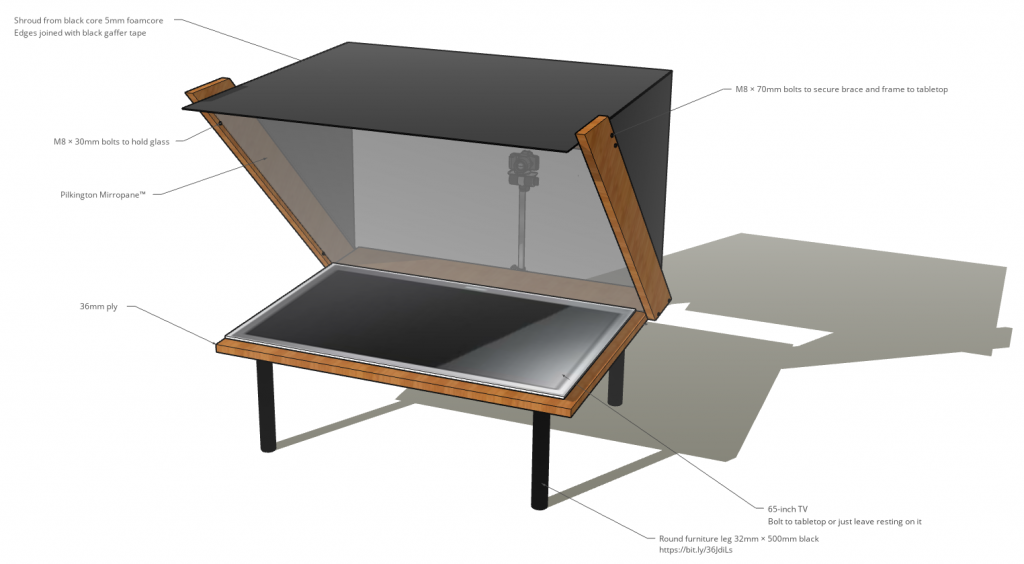
A big design like this would be easily readable, and would allow much more flexibility in positioning the camera. Even a 24″–30″ screen would be a big improvement.
The other two teleprompter improvements to make are:
- Having a brighter screen. It’s very legible in normal conditions, but harder when there are bright lights on you.
- Using proper one-way mirror glass — likely Pilkington Mirropane™ — instead of sticking film on normal glass, which still results in a bit of ghosting.
From a sound perspective, while the lav mic is fine, it would convenient not always to have to get wired up before starting a call. A shotgun mic positioned just out of view of the cameras is worth a try.
The Behringer XR-12 mixer has worked very well. However, with two computers, an Echo, a Sonos, two microphones and the audio feed from one of the monitors, I’ve used up all its inputs and there are still more things to do. The XR-18 or the (lower noise) MR18 are tempting.